
As part of the Blood Angels army I’m assembling for the Tale of Store Gamers at Maelstrom Games I wanted to have an allied detachment of White Scars Space Marines. I’ve always liked the look of white power armour but, along with Imperial Fists, the prospect of actually painting them has always proved to be too daunting. Until now that is of course. I’m just going to come out and say it: Painting white isn’t difficult, at least not to an acceptable gaming standard.
To many people, myself included, the thought of painting large white areas is too soul-sapping, but it really shouldn’t be like that. Honestly I think the biggest issue with painting white power armour is the time that it takes as well as being able to approach it with confidence. A wise man (who incidentally is a far better painter than I could ever will be) once told me that painting was 10% skill with a brush and 90% patience.
For years I doubted his wisdom but I think I’m slowly coming round to the fact that he was probably right all along…..
Prime and Basecoat
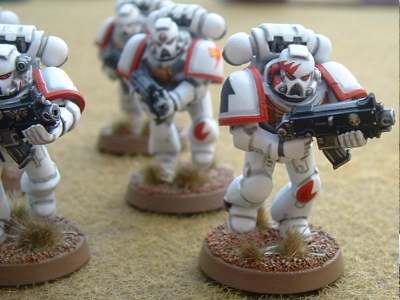
I’ve tried painting these using a few different methods but this is the way I’ve since settled on. You can prime using either grey or white – it doesn’t really matter which. If you prime grey expect to spend time layering thin coats of white to build a solid colour, and if you prime white you’ll have to shade all the recesses carefully and tidy up any mess afterwards. I find undercoating white is easiest for me, since it gives me an already white solid base to begin with.
To shade the armour I mixed a wash by adding drops of Codex Grey (Dawnstone is the new equivalent) to a pot of Lahmian Medium. I’d like to be able to tell you the ratio but it was mixed on the fly so all I can say is very little paint was added to the pot. By mixing the wash using Lahmian Medium it enables it to flow better into the crevasses and recesses more easily than it would if it had been mixed using water (and avoiding large, unsightly tide marks as well). After the wash was dry the white was tidied up. Obviously the more careful you are when washing the less time it will take to clean up the areas afterwards.
Soft Armour, Aquila and Helmets
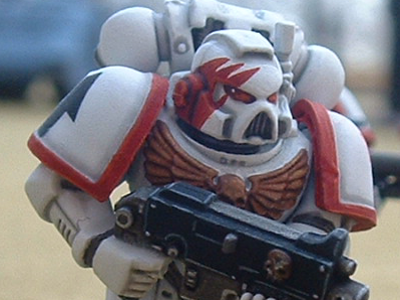
The soft armour, ribbing between the armour plates and joins was basecoated in Leadbelcher before being washed with Nuln Oil. Again, it’s worth taking the time to be neat with the metal application as it saves clean up time later on. The Aquila, as well as other detail bits like skulls and trophies were basecoated using Balthasar Gold. After washing with Seraphim Sepia they were given successive of highlights of Balthasar Gold, Gehenna’s Gold and Runefang Steel.
I painted the helmets separately to make it easier by mounting them on cocktail sticks stuck into wine corks. They were shaded in the same way as the armour, before the eyes were picked out in Mephiston Red. The eyes were then given a wash of Carroburg Crimson before being highlighted with Mephiston Red, Wildrider Red, Troll Slayer Orange and, finally in the back corner, a small dot of white. Any tribal or honour markings were then added using Mephiston Red and then highlighted with Troll Slayer Orange.
Weapons and Detailing
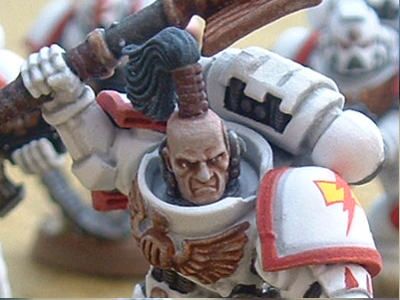
For the Sergeant I built a Power Maul using the haft from the Power Axe in the Assault Marine kit topped with an Imperial Eagle (which I think came from the Commander or Space Marine Command Squad kit). It would also work well as a Crozius Arcanum for a Space Marine Chaplain I guess. The maul’s haft was painted in Dark Flesh before being washed with Nuln Oil and re-highlighted in Dark Flesh and Snakebite leather.
The Boltguns, like the heads, were again painted separately mounted on cocktail sticks. They were basecoated in Leadbelcher and washed with Nuln Oil, before the casings were blocked in using Abbadon Black and highlighted using Dawnstone. Any skulls or aquilas were painted in the same way as the ones on the chest. A final highlight of Runefang Steel finishes off the metalworks.
Shoulder Pauldrons

When it came to the shoulder pauldrons I encountered a small problem. I’m not too great at freehand designs so the intention was always to use decals for the squad markings. However, according to the old Index Astartes article (White Dwarf 257) the markings on the right shoulder pads were supposed to be black (or red if they were pre-heresy) and the Space Marine transfer sheet only had them in white or red. Luckily I found that Forge World produce a sheet of generic transfers, half of which are in white and half in black, which turned out to be perfect. The left-hand shoulder decals came from the standard transfer sheet.
The way I have applied decals has varied over the past couple of years, but it always revolves around gloss varnish. Gloss varnish is first used on the shoulder pad and left to dry before the decal is applied using clean water and a soft brush. After leaving to dry and a second application of gloss varnish over the top of the transfer to seal it in, I use Lahmian Medium again to take off the gloss shine.
Basing and Finishing
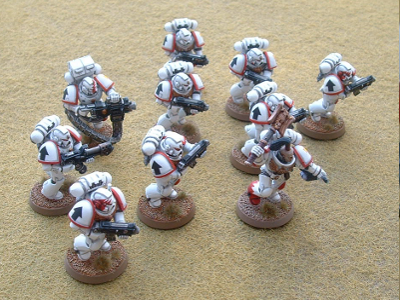
The bases are textured with fine modelling sand and painted with Bestial Brown before being drybrushed with successive tones of brown – Bubonic Brown, Bleached Bone and Kommando Khaki. As I’m going for the ‘classic’ look with these the rims were painted Graveyard Earth before grass was added. I’m actually using Citadel Middenland Tufts which, although insanely expensive, looks really, really nice when applied, and is quicker and less messy than traditional static grass. To finish off the model is given a couple of very thin coats of satin varnish.
All in all there was about 20 hours work in this squad, partly down to doing many thin layers, partly down to me being a slow painter, but there was nothing particularly difficult and the results speak for themselves.

