Tag Archives: Space Marines

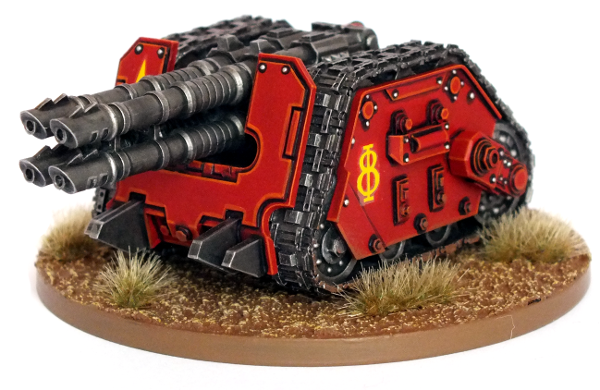
Blood Angels Rapier

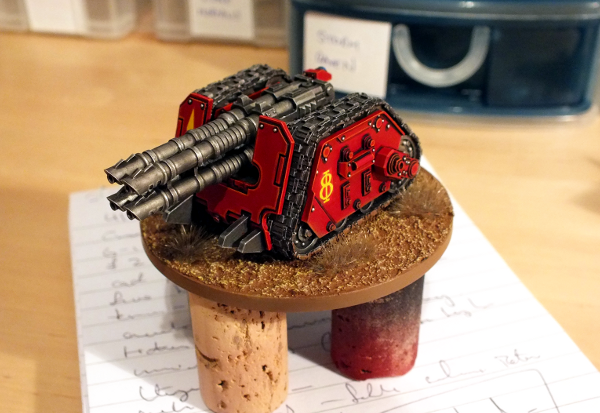
Forge World have been relentlessly pumping out marine releases for the past couple of years like they are going out of fashion. Though I can appreciate the disdain from all the xenos players out there, I also love the re-imagining of classic, iconic Space Marine units. One in particular is the Rapier artillery piece. I actually purchased half a dozen of these on release last Summer for another army but never got around to getting them made. With the changes to Warhammer 40k 6th edition and the no-vehicles theme these will make nice additions to my Blood Angels Forces.

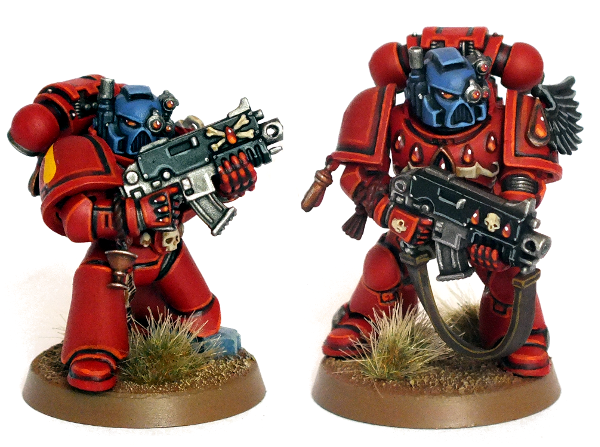
rapier_wip_02I parted with the original crew fairly soon after buying them since the mkII/III armour variants don’t fit too well with my other stuff, and built some new ones using standard plastic marine parts with a few Blood Angels bits mixed in. The artillery piece was superglued together and mounted on a base prior to priming. In hindsight this was a really bad idea, since I actually had to prise the thing apart again later to be able to get at the insides properly. In future I’ll paint the track sections and the main chassis parts separately.

crew_600px_02The models I have are all good casts and were therefore fairly easy to paint. It really didn’t take very long at all to get it finished, even including assembling and painting the new crew members. The red of the artillery piece and power armour is simply Citadel Mephiston Red, shaded with Drakenhof Nightshade and then highlighted with Troll Slayer Orange. Mephiston Red is a pretty awesome ingredient for Blood Angels players since it really simplifies the red armour process. I can’t recommend it enough. It’s probably also worth mentioning that I prime using Halfords red car primer and I find that Mephiston Red covers this easily in one coat.

rapier_600_03Now, if only Forge World could publish come consistent rules for it…. 😉

The Dead Suns Rise Again

image

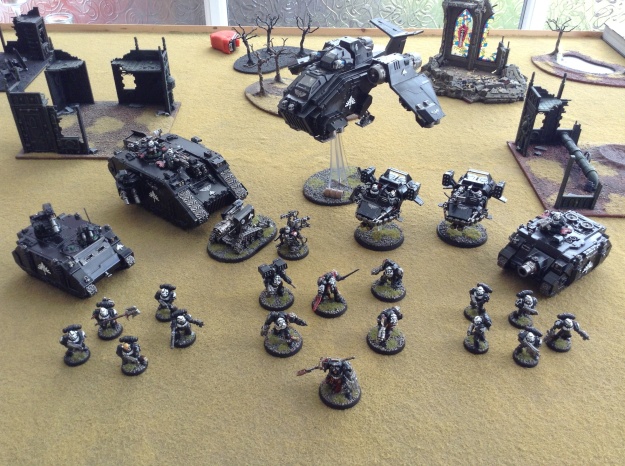
This month will see the return to the tabletop of my Dead Suns Space Marines. They haven’t seen the light of day since the introduction of 6th edition 40k as I’ve been preoccupied with my Blood Angels army, but since the Storm Raven has now been added to the Space Marine codex I feel like using them again. The Storm Raven’s offering of versatility with punchy air support fire power and transport capabilities, coupled with the fact mine never gets used provides the perfect excuse to use it again.

I’m entered in a 1500pt single-day, three round tournament at The Outpost in Sheffield (lovely, friendly place by the way). Though not particularly a tournament-focused gamer I do like to do the odd ones, especially smaller events, and they’re always a good opportunity to meet a few new faces.

This is the list I’ve put together to use at the weekend;

  • 1 x librarian in terminator armour with storm shield
  • 5 x terminators, cyclone missile launcher, chainfist
  • 5 x tactical marines, combi-plasma
  • 5 x tactical marines
  • 1 x razorback with lascannon and twin-linked plasmagun
  • 1 x land speeder with typhoon missile launcher and heavy bolter
  • 1 x land speeder with typhoon missile launcher and heavy bolter
  • 1 x land raider with twin-linked lascannons, heavy bolter and multi-melta
  • 1 x vindicator
  • 1 x thunderfire cannon
  • 1 x storm raven with twin-linked plasma cannon, stormstrike missiles and multi-melta

It may seem a strange list at first but of the three missions on the day, only the first one contains multiple primary objectives. Mission two is the Emperor’s Will and mission three is a variation on the kill points scenario. After getting pummeled several times with my Blood Angels, who incidentally have very little weaponry that has a range greater than 12″, it will be nice to actually be able to pick a target and shoot something on turn one…….

Sponge Weathering Tanks

I’ve spent the past year building up a new Blood Angels army and this next six months sees the development of a Deathwing force. This means my original baby, the Dead Suns chapter, has been sat in the corner feeling neglected, unloved and forgotten. However they need search for absolution no longer since I’m periodically going back and giving them all small updates.

Back when I started up with the Dead Suns I was fresh back into 40k after a lengthy absence and the army was built to the standard I knew I could achieve at the time using the materials and skills I already had. Some techniques and methods I avoided at the time simply because I wasn’t capable of doing a good job. One such finishing technique was weathering. I’ve never been a massive fan of the ultra-realistic finish on sci-fi tanks. I think it works extremely well in the historical context of wargaming, but personally in the 40k setting it doesn’t really work for me. However, small amounts of weathering can really give the army that little something extra.

It might help to practice on a spare model first so you don't ruin a perfectly good paint job.

It might help to practice on a spare model first.

As I’d never done any work like this before I decided to do some practice on an old Rhino. Luckily I have Rhino chassis coming out of my ass.

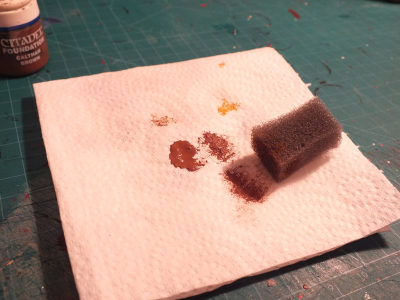
OK, what do we need? Well you are going to need some paint. For this I used Calthan Brown, Graveyard Earth and Bubonic Brown. Truth is any earthy browns, greys and reds will do depending on the severity of weathering you require.

You’ll also need a palette – though for this I actually just use a paper towel folded in half a couple of times. This is because you almost want the paint dry (exactly as if you were drybrushing) and the paper towel absorbs some of the moisture.

Next up is the sponge. I used a piece similar to those that (used to) come in a blister pack but any sponge will do. Something like a kitchen scouring pad (don’t tell the wife) or an offcut of foam from an army case will do fine. Cut a piece that is around 10mm square and long enough to hold. Lastly, and perhaps most importantly, you’ll need a painted tank.

Wipe off most of the paint on a paper towel.

Wipe off most of the paint on a paper towel.

The technique is actually very simple and quick. The difficulty (and certainly in my case) is in overcoming that barrier in your head that says you are about to foul up a perfectly nice tank.

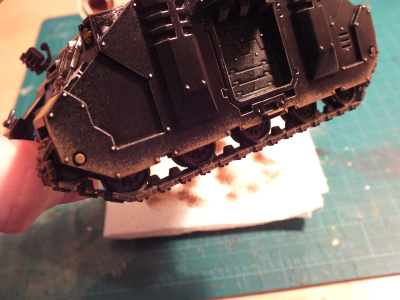
Put some paint on whatever palette you’re using and dip the end of the sponge in it. Again, exactly as if you were drybrushing, you want to wipe off as much excess paint as you can. Dab the sponge against the model in sharp, stabbing motions. Certainly you don’t want to drag or rub the sponge across the surface as this will just smear and likely look terrible.

Think about where the mud will have collected (reference photos of real-life vehicles helps here) and apply more heavily in those areas. Bear in mind as well that wet mud is darker than dry mud.

Build the layers up one by one concentrating on the areas mud would collect most.

Build the layers up one by one concentrating on the areas mud would collect most.

Apply subsequent colours and build it up until you have the desired amount of weathering and dirt (these colours work well for green battlefields but if you usually play amongst city ruins and buildings consider light browns and greys for a more urban look).

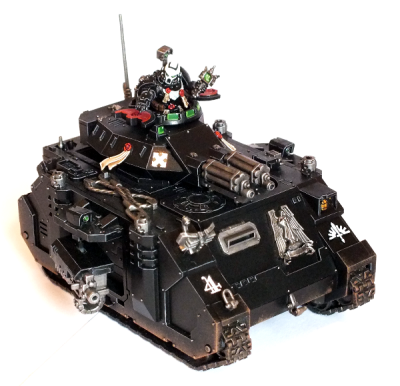
For this Baal Predator I’ve opted for fairly light wear in fitting with the rest of the army’s ‘clean’ look but you can keep going if you want to, applying more and more layers, for a full-on, driven-through-a-swamp effect.

All that remains is to seal the model. A quick spray of Purity Seal (which for me has replaced the old gloss finish the Dead Suns used to sport into battle) and it is back ready for its second tour of duty on the tabletop.

baal_predator_redux_600px_01

Painting White Scars

As part of the Blood Angels army I’m assembling for the Tale of Store Gamers at Maelstrom Games I wanted to have an allied detachment of White Scars Space Marines. I’ve always liked the look of white power armour but, along with Imperial Fists, the prospect of actually painting them has always proved to be too daunting. Until now that is of course. I’m just going to come out and say it: Painting white isn’t difficult, at least not to an acceptable gaming standard.

To many people, myself included, the thought of painting large white areas is too soul-sapping, but it really shouldn’t be like that. Honestly I think the biggest issue with painting white power armour is the time that it takes as well as being able to approach it with confidence. A wise man (who incidentally is a far better painter than I could ever will be) once told me that painting was 10% skill with a brush and 90% patience.

For years I doubted his wisdom but I think I’m slowly coming round to the fact that he was probably right all along…..

Prime and Basecoat
ws_04
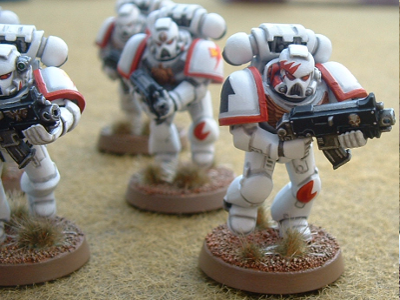
I’ve tried painting these using a few different methods but this is the way I’ve since settled on. You can prime using either grey or white – it doesn’t really matter which. If you prime grey expect to spend time layering thin coats of white to build a solid colour, and if you prime white you’ll have to shade all the recesses carefully and tidy up any mess afterwards. I find undercoating white is easiest for me, since it gives me an already white solid base to begin with.

To shade the armour I mixed a wash by adding drops of Codex Grey (Dawnstone is the new equivalent) to a pot of Lahmian Medium. I’d like to be able to tell you the ratio but it was mixed on the fly so all I can say is very little paint was added to the pot. By mixing the wash using Lahmian Medium it enables it to flow better into the crevasses and recesses more easily than it would if it had been mixed using water (and avoiding large, unsightly tide marks as well). After the wash was dry the white was tidied up. Obviously the more careful you are when washing the less time it will take to clean up the areas afterwards.

Soft Armour, Aquila and Helmets
ws_03

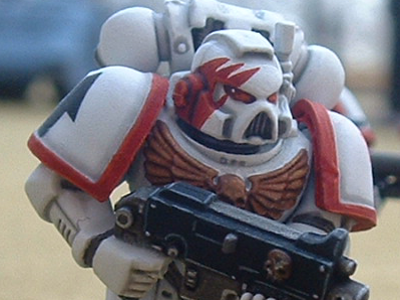
The soft armour, ribbing between the armour plates and joins was basecoated in Leadbelcher before being washed with Nuln Oil. Again, it’s worth taking the time to be neat with the metal application as it saves clean up time later on. The Aquila, as well as other detail bits like skulls and trophies were basecoated using Balthasar Gold. After washing with Seraphim Sepia they were given successive of highlights of Balthasar Gold, Gehenna’s Gold and Runefang Steel.

I painted the helmets separately to make it easier by mounting them on cocktail sticks stuck into wine corks. They were shaded in the same way as the armour, before the eyes were picked out in Mephiston Red. The eyes were then given a wash of Carroburg Crimson before being highlighted with Mephiston Red, Wildrider Red, Troll Slayer Orange and, finally in the back corner, a small dot of white. Any tribal or honour markings were then added using Mephiston Red and then highlighted with Troll Slayer Orange.

Weapons and Detailing
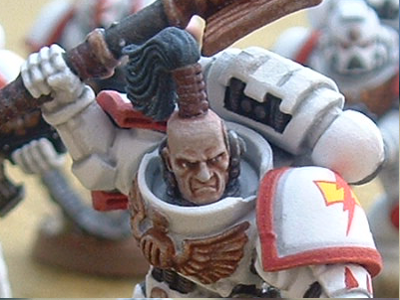
ws_02
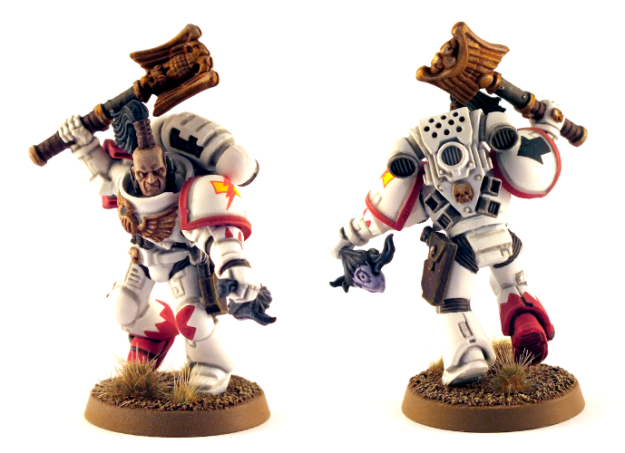
For the Sergeant I built a Power Maul using the haft from the Power Axe in the Assault Marine kit topped with an Imperial Eagle (which I think came from the Commander or Space Marine Command Squad kit). It would also work well as a Crozius Arcanum for a Space Marine Chaplain I guess. The maul’s haft was painted in Dark Flesh before being washed with Nuln Oil and re-highlighted in Dark Flesh and Snakebite leather.

The Boltguns, like the heads, were again painted separately mounted on cocktail sticks. They were basecoated in Leadbelcher and washed with Nuln Oil, before the casings were blocked in using Abbadon Black and highlighted using Dawnstone. Any skulls or aquilas were painted in the same way as the ones on the chest. A final highlight of Runefang Steel finishes off the metalworks.

Shoulder Pauldrons
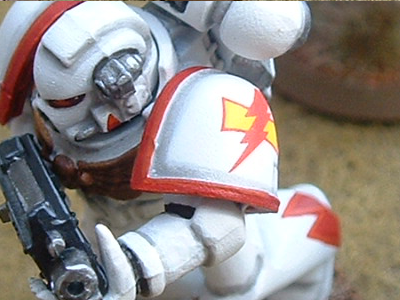
ws_07

When it came to the shoulder pauldrons I encountered a small problem. I’m not too great at freehand designs so the intention was always to use decals for the squad markings. However, according to the old Index Astartes article (White Dwarf 257) the markings on the right shoulder pads were supposed to be black (or red if they were pre-heresy) and the Space Marine transfer sheet only had them in white or red. Luckily I found that Forge World produce a sheet of generic transfers, half of which are in white and half in black, which turned out to be perfect. The left-hand shoulder decals came from the standard transfer sheet.

The way I have applied decals has varied over the past couple of years, but it always revolves around gloss varnish. Gloss varnish is first used on the shoulder pad and left to dry before the decal is applied using clean water and a soft brush. After leaving to dry and a second application of gloss varnish over the top of the transfer to seal it in, I use Lahmian Medium again to take off the gloss shine.

Basing and Finishing
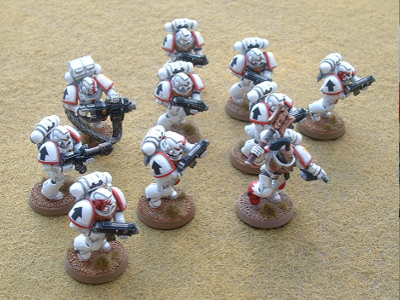
ws_06

The bases are textured with fine modelling sand and painted with Bestial Brown before being drybrushed with successive tones of brown – Bubonic Brown, Bleached Bone and Kommando Khaki. As I’m going for the ‘classic’ look with these the rims were painted Graveyard Earth before grass was added. I’m actually using Citadel Middenland Tufts which, although insanely expensive, looks really, really nice when applied, and is quicker and less messy than traditional static grass. To finish off the model is given a couple of very thin coats of satin varnish.

All in all there was about 20 hours work in this squad, partly down to doing many thin layers, partly down to me being a slow painter, but there was nothing particularly difficult and the results speak for themselves.
white_scars_tactical_sergeant_500px_01

You’ve Been Framed

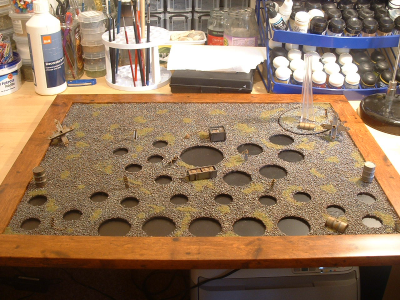
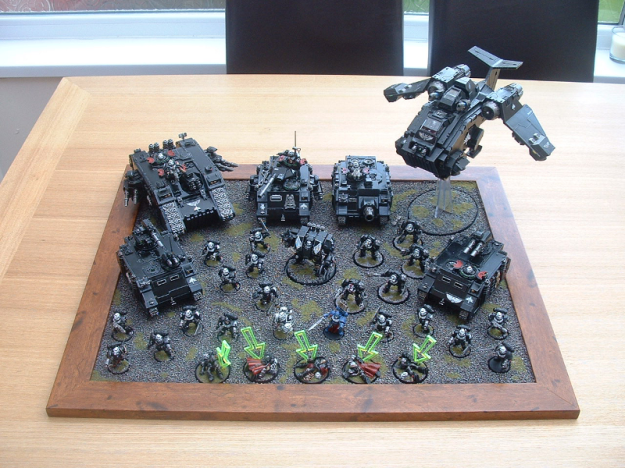
Recently I’ve spent a lot of time looking at the entries for Games Workshop’s Armies on Parade contest. For a time I considered making an entry of my own, though in the end I chickened out through either lack of confidence, motivation or simply the fear of public humiliation. However this past week, with those thoughts still lodged in my head, I did some poking around with a few ideas. I decided I wanted to create a multi-purpose base for my current tournament-orientated list. It would serve as both a carrying tray and as the base for a display piece (a la Armies on Parade). Style with function, so to speak.

My initial thoughts were to use a wooden shelf kit as the base (my woodworking skills are limited so precut kits are useful as I don’t have to worry about straight lines….). I did a bit of doodling creating some mockups on paper until I got an idea of how it was going to look. I went to Wilkos the following morning only to find the shelf kit I had in mind was actually out of stock. Being the impatient type I wandered around the shop, leaving my wife sat outside with the dog, in search of some much needed inspiration.

Mock-Up

When all looked lost and my interest was waning I caught sight of some picture frames. They were deeper than the shelf would be, but not as wide. Hmmm, I could use these…. I picked up one with a walnut effect type finish (it’s actually laminated plastic) and headed for the checkouts. I got it home and ripped away the plastic wrapping and took the frame apart. Handily the back piece was actually 2mm thick MDF – perfect for what I wanted. I also removed the glass as I would be needing that later. I took some time to make some alterations to my paper template to fit the new dimensions and affixed it to the MDF with some masking tape.

Frame

I then retreated to the shed for an hour, much to Karon’s amusement, to cut out all the necessary holes (lots of swearing and shouting was to be heard apparently). The 25mm holes were drilled out using a standard 25mm spade bit, while the 40mm and 60mm holes were made using an adjustable holesaw (tip for anyone else who does it – 60mm bases aren’t actually 60mm). The hole for the Storm Raven base was cut out using a jigsaw. After a quick sanding of the holes it was time for some assembly.

I took the original piece of glass and using some spray-mount adhesive glued it to the back of the MDF sheet, forming the new base. After all the glue was dry the whole assembly was given a coat of primer (Halfords car primer as usual) and left to dry before it was given a second coat. When the primer was completely dry the assembly was put back into the frame and fixed in position with liquid nails and clips.

Base-02

For the actual battlefield surface I resorted to the same method I use on individual miniatures. In hindsight I probably could have done it a lot cheaper by altering the method, but this way works at least. The base was covered in watered-down PVA glue before having fine gravel (Hornby railway ballast) poured over the top.

Again this was left to dry overnight, and the following morning all the excess was tipped away. This was followed by a quite liberal application of Devlan Mud. In all I used six whole pots, and no doubt it would probably have been more advisable to use either thinned brown paint, or even Vallejo’s brown wash which is available in large bottles. All said though, I’m happy with how it looks. It’s important that the wash is completely dry so this was left overnight again.

Base-03

The next day the surface received several heavy drybrushes; Codex Grey, Fortress Grey, Bleached Bone and finally Skull White. I also applied Scorched Grass in uneven patches. Isn’t it strange that the more you try to make something appear random, the more uniform it actually looks? Anyway, with the grass in place I put the army on to get an idea at how things were looking. Though I thought it looked OK, felt it needed something more. Minor details and character were needed in some way. I drove over to Maelstrom (handy having it within a five-minute drive) and had a poke around. Rather surprisingly there wasn’t much that I could put to use, save for an old pack of the Citadel Battlefield Accessories set. I grabbed one of those and headed back home.

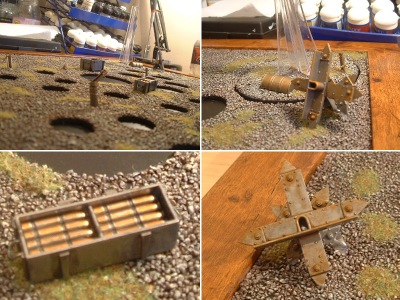
To reinforce the oil drums and tank traps from the rather lacklustre kit I found out some old girders from an Italeri kit, as well as some scale barbed wire that had been sitting in a box for years. All these parts were then assembled, base coated in Boltgun Metal and given dirty washes of browns and reds, before a drybrush of orange, giving a nice rusty effect. These were then dotted around the surface to break up the linearity.

And there we have it – the multi-purpose display tray. I’ll be at the UK Team Challenge next weekend, and will no doubt have it with me, desperately attempting to improve on my position from last year (40th out of 40). 😉

Update: For the record I was individually ranked 16th. 🙂

Base-01

Land Speeder Stage-by-Stage

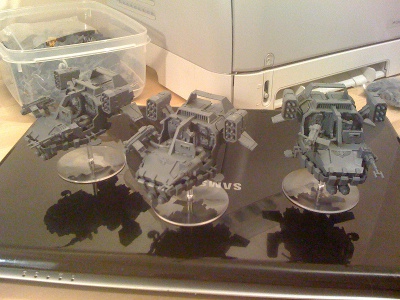
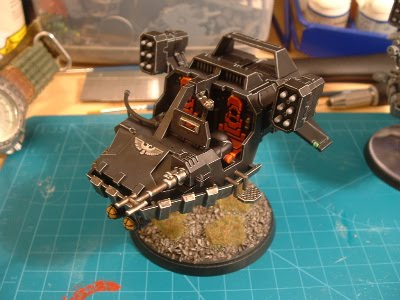
The Land Speeder model has always been a massive favourite if mine despite the fact that I’d never used them on the tabletop. Finally I’ve got round to it and this is the journey of one of my Typhoon-pattern speeder’s progress from plastic to painted. Even though it’s almost identical in appearance to the original 3rd edition plastic kit this new effort is much easier and pleasing to put together. The old kit was a bit of a pig to put together with unwieldy seams and ill-fitting parts but this one is a much more streamlined affair and the parts layout and construction makes far more sense. At last you don’t need three hands to put it together satisfactorily. To put things into perspective the old kits take me around 45 minutes to assemble, while this one takes around 15. Massive, massive difference. The base was magetised as per the tutorial here.

IMG_1386_800x600
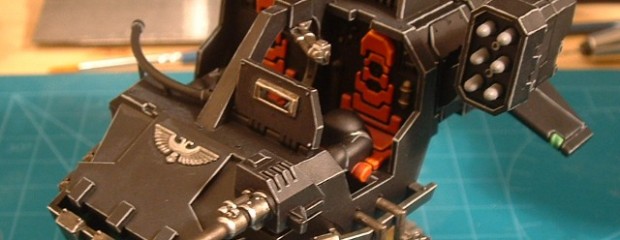
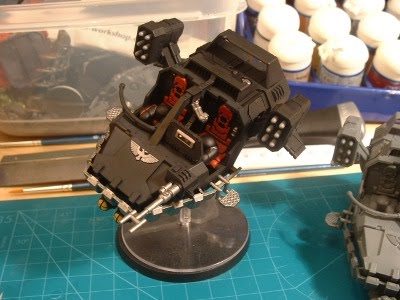
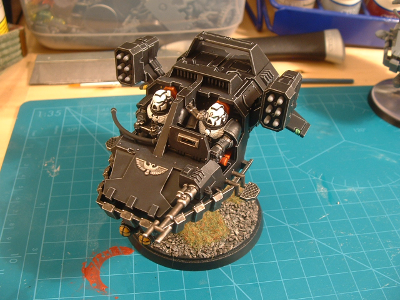
I really hate painting vehicles but I persevered and gave it a black spray followed by a few base coats. This first stage was surprisingly quick on this, helped along the way by copious amounts of coffee and Hob Nob biscuits. The seats got a coat of Mechrite Red, Iyanden Sun for the lights, Codex Grey for the missile tips and the metal areas were done in Boltgun Metal. The control panel console details were painted in using the same colours plus a little Snot Green and Ice Blue. I glued the original flying base onto a 60mm base simply so that it matches the rest of my army. Completely unnecessary but my OCD thinks it adds to the cohesiveness of the army.

landspeederWIP01
This next step took hours (and hours). Sometimes I question what I was thinking when I started this army, particularly that moment lay in the bath where I was thinking that painting stuff black would be easy? I highlighted every single panel edge and recess as per usual with Codex Grey- I even highlighted the Recaro-lookalike seats with a little Blazing Orange despite the fact that they’ll hardly be visible when assembly is complete. I think it’s worth the time and effort although it’s demoralising and fatiguing during the painting. It seems to take forever with no end in sight. All the metal areas were washed with both Devlan Mud and Badab Black before being highlighted with Mithril Silver. The base was built up using railway ballast mixed with PVA glue, before being washed in Devlan Mud and drybrushed with Codex Grey followed by Bleached Bone. A final application of Citadel Scorched Grass finishes it off.

DSCF0011
To make things more simple the crew were painted separately, following the same techniques and procedures as the rest of my marines. I must admit I wasn’t truly happy with the model until the pilot and gunner were test fitted. It’s like flicking a switch to ‘ON’ – all of a sudden everything looks ‘right’.

landspeeder6
The crew and heavy bolter were removed again and varnished separately using Citadel ‘Ardcoat, while the speeder itself was removed from its base and given a couple of sprays of Vallejo Brilliant Gloss. I prefer spraying tanks and vehicles since the finish is far superior to using a brush.

Land-Speeder-Typhoon1
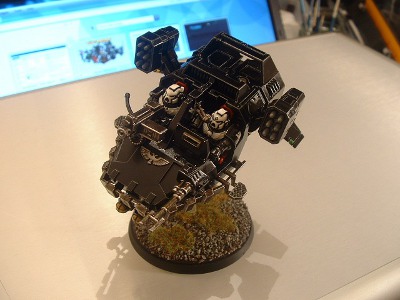
And there’s the finished Land Speeder. The whole thing took four evenings to complete, although I did a second in just two nights. They really are wonderful models and look awesome on the tabletop, as well as being effective in gaming terms as well. An in depth look at Land Speeder tactics can be found in the first installment of our Chapter Standard here.

Celebrating The Three Thousand

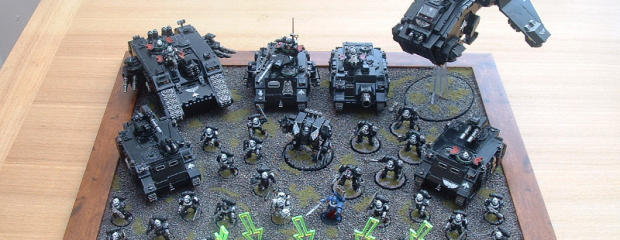
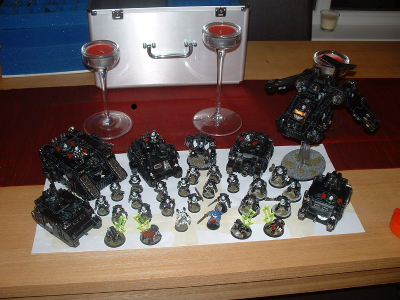
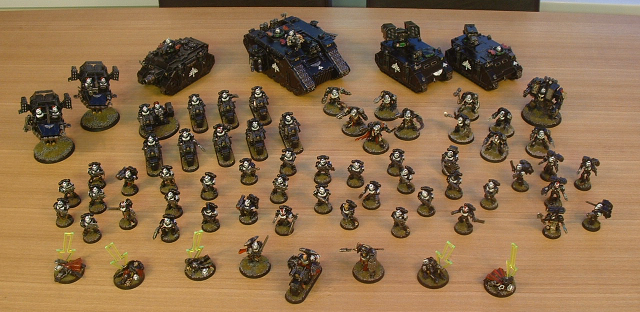
The-Three-ThousandIf anyone would have told me when I started up in February of this year that I would would be where I am now then I wouldn’t have believed them. In fact I wouldn’t have thought I’d have even been capable of it. I’m inherently lazy and that’s compounded by a short attention span. At times painting these has been tough going and I’ve wanted to throw the paint brush away, but the rewards far outweigh the pain. Being able to plonk this little lot down on the battlefield fills my heart the kind of indescribable geeky pride unattainable elsewhere. As Brian says, the odd compliment certainly doesn’t do any harm either and I’ve more people praise them than those who’ve not particularly liked what I’ve done. I think it shows what can be achieved in a relatively short space of time with enough dedication and effort, even with limited ability.

It got me thinking though. How much of an obsessive collector am I? My intention was not explicitly to have thousands upon thousands of points of models, more just to have enough to be able to select my forces freely according to whim. I know I’ve always been a hoarder, and anyone who knows me would likely agree, but with 40k it feels slightly different. In fact I’ve attained so many models in just a few months without even realising it. I dread to think of how much money I’ve spent and I’m sure if my wife knew the sums involved there would be severe repercussions. I’ve exactly 3000 points painted as of today, but probably a further 5000 points sat in various stages of development and that’s after getting rid of some stuff via eBay. I’ve got boxes of grey plastic, boxes of undercoated plastic, plastic sat in bottles of Dettol and then the plastic I’m working on now. Realistically speaking how many times am I ever actually going to be able to field 3000 points? Let alone the rest of the crap buried in the office? What about the titans and thunderhawks I’ve got planned as well? I know for a fact if GW introduced a brand new unit, no matter how bad it was on the battlefield, I’d likely go out and try it.

I know I’m not alone with this either. How many gamers can say they have a 1500 point army and that’s all? I dare say there won’t be many. Shiny New Plastic Syndrome has tightly grasped us all firmly by the genitals and we’re pretty much incapable of getting ourselves free. And, even if we could, would we want to? The lure of massed marines, hordes of Tyranids or mobs of Orks is strong enough to keep us motivated. Strong enough to keep us all building, converting, painting, playing, and most importantly of all, enjoying ourselves.

Grey Plastic Hordes

dullheader-620x240

My first foray onto the Overlords podcast as a guest on their Room 40001 segment gave me ample opportunity to take aim and fire my meltagun at one of my biggest bugbears (listen here). The issue has always bothered me to an extent where it spoils the game at times, which probably makes me sound like a douche but bear with me….

I am of course talking about unpainted armies. The naked grey plastic mounds that sit either end of the table in venues around the world. My grief is not limited to the greyness either – for there is a far more annoying phenomena – armies simply sprayed black. From four feet away what appears to be an Ork with a big choppa may actually be a scout with a shotgun. OK, maybe that’s a bit of an exaggeration but you can see what I mean. In purely gaming terms it makes units difficult to distinguish and recognise with my ageing eyes.

The biggest annoyance for me however, is that unpainted miniatures spoil the immersion. Personally, the spectacle was always an integral part of the game’s appeal and paramount to the creation of the grim dark atmosphere of desperation and struggle. The battles are supposed to be epic, representing the fate deciding conflicts of entire civilisations, after all. Maybe this comes from my background as a modeller – I played around with model kits as a kid many years before I started playing games, but I suspect its actually a direct result of my exposure to 40k through White Dwarf.

See, as a thirteen year old kid I was busy playing Hero Quest with my school friends and one day (actually they did it twice) GW published expansion rules in White Dwarf. This lead me to pick up a copy and subsequently exposed me to a universe that I didn’t know existed. Early ‘Eavy Metal shots of terminator squads stalking across a detailed battlefield are precisely the reason I wanted to be involved with the game, and my love for painted miniatures was born. This was cemented month after month with beautifully crafted minis every issue, and I’ll admit to being guilty of standing in front of Games Workshop Meadowhall drooling over the painted minis in their window. On several occasions as well, it’s a surprise they never called in security to prise me out of my saliva-soaked puddle.

I have to admit admit my own Blood Angels army, which was used from 1990 until 1997, wasn’t particularly well painted. Well, at least it was red. I’m almost glad I no longer have them as they were probably even worse than I remember (so thankful it was before the advent of affordable digital cameras). Nostalgia is a powerfully blinding light at times. What I can guarantee however, is that a monumental amount of time and effort was put into creating a cohesive, themed force. This begs the question; What would you rather play against? An unpainted army, or a badly painted army? So long as effort is in evidence I’d go against the badly painted stuff every time without any doubt at all.

Not all of us, myself included, are great painters. In fact, not many of us are. Painting takes dedication and a substantial chunk of time, something very few of us possess. We have a few guys from Roll With It who regularly plonk down some unpainted miniatures on the battlefield, yet I don’t have a problem these. Why? Because these guys all actually make an effort to get models painted, albeit at a slower pace than myself. They might paint a unit a month, which in my eyes is absolutely fine with progress always in evidence.

It’s the 100% sprayed black armies that I could rant about the most. Usually purchased as a whole army in one go, undercoated and then used for six months with not so much as a sniff of Blood Red or Bleached Bone, before being sold on eBay with the owner moving onto a whichever new uber Codex that has been recently released. I suppose its no coincidence that a lot of these lifeless, dull, detachments belong to power gamers and are made up purely from some internet-originating min-max spam competition lists.

As previously documented I myself have a love/hate relationship with painting models yet I persevere and I think the effort is worthwhile. Other people may say that they have no interest in painting and just want to play the game, but I’d argue painting is part of the game. 40K is a vast, all encompassing envelope of fluff, story, modeling, painting, socialising and gaming.

Take any one of those ingredients out and its just not 40k anymore.

Converting Metal Miniatures

Metal miniatures generally have a bad reputation. They’re expensive, they chip easily, they’re too heavy etc, but the one gripe that seems to be levelled at them more than most is that they can’t be easily converted. Of course working with plastic is no doubt far easier but there are times when you will need to work with metal parts. With a little patience, some time and most importantly, the right tools, it’s not a difficult job. To illustrate this I’m going to take you through the process of creating a ‘counts-as’ Kor’sarro Kahn for my Space Marine army.

Gathering the Components;

kk07
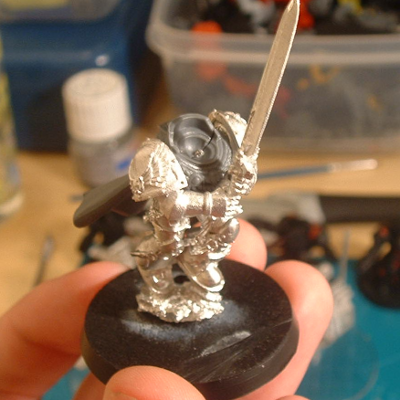
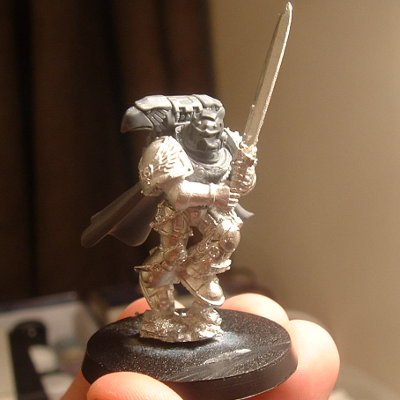
The first thing to do, and probably that which represents the hardest job, is deciding on the components you want to use. Kahn’s wargear (power sword and bolt pistol) dictate part of his look so from that starting block, as well as referencing Games-Workshop’s own official Kahn model (which doesn’t fit my theme with the White Scars iconography), a picture can be built up of what he is to look like. For a while I’d looked at the Vanguard Veteran kit searching for an excuse to use them – lovely models, but such a garbage unit in game. The marine with the two-handed relic blade in particular is awesome and so I decided that he’d be the basis for my Kahn. I’d be using his legs and his arms (with relic blade attached) for this project, while the torso, cape and eagle backpack all came from the plastic Space Marine Commander boxset and the head from the Space Wolves Pack kit.

Cutting the Legs;

kk02
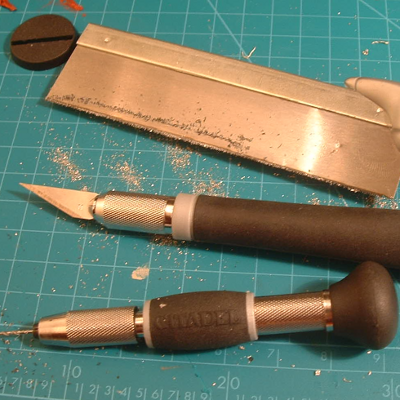
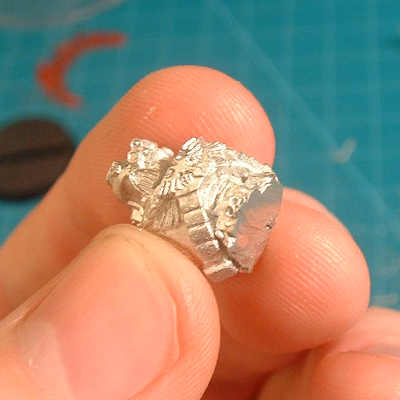
The Vanguard Vet’s body and legs were one piece, but it had the jump pack harness moulded onto the torso so that would have to go. In order to get nice clean cuts on metal minis using the right tools is essential. A good razor saw, hobby drill, vice, needle files, hobby knife, green stuff, paperclips and super glue are all absolute necessities. Holding the figure in place with the vice (preferably clamped with rubber jaws so it doesn’t damage the sculpt) and carefully cut away the top half using the razor saw. A razor saw’s kerf is extremely narrow so when cut both parts will be perfectly usable and nothing is wasted. It’s even possible to use it to cut detail like panel lines into plasticard or sheet metal. Using the pin vice holes were drilled into the feet and 10mm lengths of straightened paperclips were glued into the holes. A 25mm length was also glued into a hole drilled into the pelvis, serving as a mount for the new torso.

Preparing the Base;

kk03
To avoid any balance issues I decided to mount the mini onto a 40mm base. Hopefully that will stop him from toppling forwards. I’m aware the rules state bases should be the size supplied, but the ‘rule-of-cool’ takes precedence here and a larger scenic would look better anyway. To determine where the holes in the base would need to be simply take your prepared legs and apply a dab of paint to the pins protruding from the feet, then position the legs where they will need to be on the base, and it will leave a paint mark in the place where the holes will need to be. Using the paint marks as a guide drill the holes using a 1mm bit and hobby drill. Apply a little superglue to the miniature’s feet, and also the pins themselves and then insert into the base and leave to set. I usually leave this overnight at this stage since you want to make sure it has completely set before you start adding any more weight to it.

Assembling the Torso;

kk01

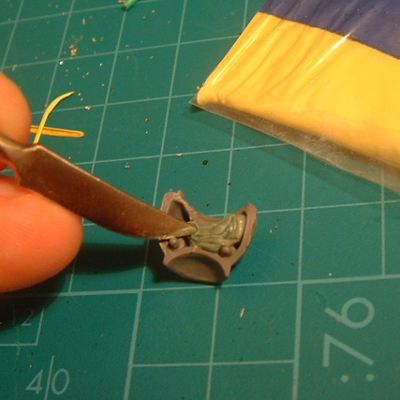
The torso came from the plastic Space Marine Commander kit and is supplied in two parts. After cutting the components from the sprue and cleaning away any mould lines the two halves were then filled with green stuff (plastic putty or milliput would also do here) before being glued together using polystyrene cement. Polystyrene cement, or plastic glue, will form a much stronger bond on plastic to plastic than super glue will as it actually fuses the parts together. The underside ‘bowl’ of the torso, was then also filled with green stuff, creating a flat base to sit on the new legs. Again using a 1mm bit, holes were drilled into each shoulder as well as up all the way through the torso and out the neck hole. Insert the pin from the legs section into the torso and slide it through. The torso should sit nicely on the legs and the pin should protrude slightly through the neck hole. Making sure everything is sat properly, it’s again left to dry.

Attaching the Arms;

kk06

Since there will be a fair amount of weight in the arm section leaving the miniature top-heavy it’s important that they’re properly attached. Pin the second hand to the sword handle (the first is already attached) but don’t glue it yet. Drill holes as before into the shoulders and then superglue 10mm pins into place and set aside to dry. When these are dry the arms can finally be attached to the torso. Superglue all the pins in place, including the second hand to the handle.

When pinning joints it is often worth cutting the pins too long and the trimming them down after they’ve been fitted. A number of different things can be used for pinning – florist’s wire, metal rods, heavy staples – even drawing pins. I tend to use paper clips as they appear to be breeding in my office. This baby isn’t going to fall apart!

Final Assembly;

kk05

To finish off its simply a case of attaching the backpack to the torso using a little plastic glue (I actually usually leave this part till after painting so I can get access to the cloak properly). The final piece to fit is the head. Drill a 1mm hole into the head to accept the pin and superglue it into place. Although the torso and head are both plastic, the superglue is needed to adhere to the pin giving the entire torso plenty of strength and stability that should stand up to some hard gaming.

All that remains is to get the painting done! So, its evident that its not as easy to convert metal miniatures as it is to alter plastics, but it is possible, and with care and patience its well worth doing. Look out for Kahn and his outflanking Land Raider coming to a gaming table near you soon!